Models Own Review: Colour Chrome / Metallic Range Collection + Swatches

Hey guysss!! It feels like so long since I've sat down to write a post but I'm back! I'm still working on my organisation and learning how to fit in a-levels, have my blog, take care of me, chill with the fam, doing a part-job etc. But I feel like I haven't done a beauty post in a while so today I will be doing a quick review on the models own metallic range because you guys know I go hard for models own!
Now I love models own. Their shop, their page and the range of polishes they have is crazy. Plus if you go to their shop in Stratford, Westfield; you can definitely try out some polishes before you purchase which is great and avoids any surprises. So I’m rooting for models own on their polishes.
Now I’ve used all of the metallic polishes that I will be reviewing in this post. So I can conclude that they’re all roughly the same in texture, application and appearance (obviously omitting the colour). However you can check for this in the pictures down below.
General Observations:
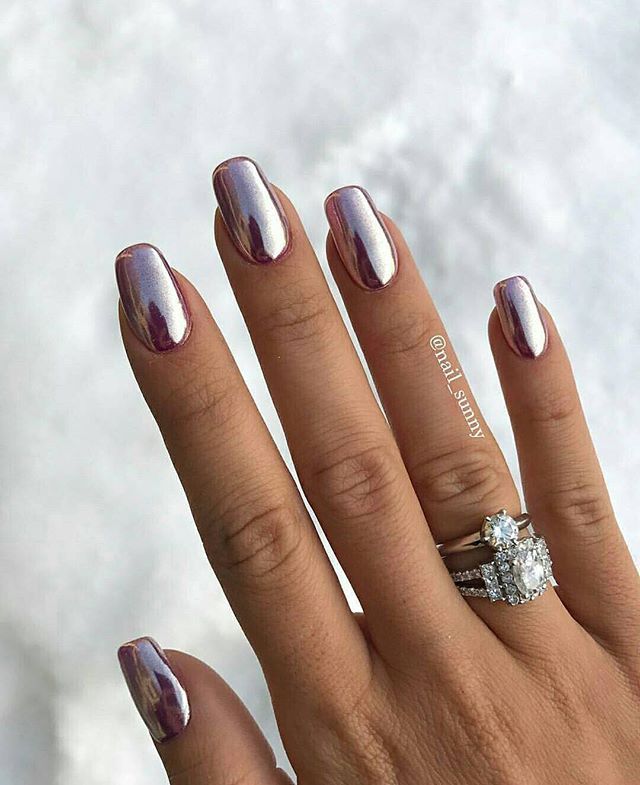
One thing I like about the metallic range is the colour selection. There’s rose gold, silver, a nice pink that's named 'cerise', and various other colours which I personally didn’t have before so they’re definitely an addition and unique among my current nail polish collection. The packaging is ON POINT in terms of the bottles but understandably not many would be too fussed about that and that’s okay. After multiple applications of the polish, it looks decent and nice in photos. Another great thing is that they dry quickly. They don’t tend to take forever like some nail polishes would. So I've gots to give models own credit for all those things because essentially, that's what I look for in polishes.Now… I’m a big fan of Models own, especially their ‘normal’ nail polishes. However I’m not feeling their colour chrome range. Personally, I believe that it’s because I had a very high expectation of what was going to be applied onto my nail bed, this was simply because of the way the bottles look like. What needs to be understood is that what you see on the exterior is not always what you're going to find on the interior. When I saw the bottles, I believed that the polish would have a glossy, mirror effect. Similar to the photo HERE. Overall, the way the bottle looks, that’s the way I thought the nail polish would be like once it was on my nail plate.
These polishes do not give you that effect. Which is not a negative thing for those that like the outcome. But in MY opinion, it’s not ideal for ME due to the expectations I had. But all the same, I did warm to the overall look in the end.
When you apply the polish once, you still have gaps/streaks because the polish is manufactured in a certain way to give a somewhat metallic effect which means one application ain’t gone do nothing boo. Therefore you have to go over it again, and again, and probably again before the whole nail is covered evenly and has no weird lines/streaks as if you haven’t shaken the bottle properly.
On a bad day the coating may not be entirely even. Probably due to my application, I previously experienced a few air bubbles which is not great :)
Another thing! I really don't recommend using nail tape with the polish for designs. If you want to do stripes and you put a base colour and then a metallic colour from this range on top, it will peel the whole thing off and ruin the nail design. I tried and I failed. Of course this is merely from my own experience but if you do decide to do nail art with these polishes - proceed with caution. ._.
SWATCHES:

1. Gold
2. Olive
3. Rose
4. Silver
5. Green
6. Pink
7. Mauve
8. Cerise
9. Indigo
10. Blue
 |
| Edited |
 |
| No edit |
Q & A:
How many coats would you normally apply?
3-4. I usually apply 2-3 for a standard nail polish.What’s the overall look of the polish once done?
In all honesty it looks like a normal polish but just a bit shiny.Does it chip easily/how long does it last?
This will vary depending if you used a topcoat or not or if you do a lot of activities which will cause it to chip such as sports/cleaning dishes. For me personally, some of my nails were fine, others chipped. This is most likely because I did my hair the next day which requires a lot of shampooing, moisturising and other things that could cause the chipping.What designs can I do with this if I don’t want to use it for a normal coat of polish?
I'm not even gone lie – the only design I’ve tried using these polishes was the nail tape to create stripes and that flopped. Hopefully this can be used to create dots for a design using a dotting tool.
Overall impression:
I love models own. But they’re fairly pricey. So I would have thought this would be amazing and produced the same results as seen on Pinterest. Nope.Now I don’t want to say it’s completely TERRIBLE because it’s not. The colours and drying time is great. But the desired effect is just not doing it for me. So with that said, I would give it a 2.5/5.
If any of you have tried it and have any other views, feel free to comment. Just be careful, I would suggest trying it out in the shop before purchasing to understand what you’re getting. This is just my honest opinion. Of course opinions do vary so you can check for other reviews if you’re uncertain or need a second opinion. With that being said, have a great week guys!
“Great things happen to those who hustle” - unknown